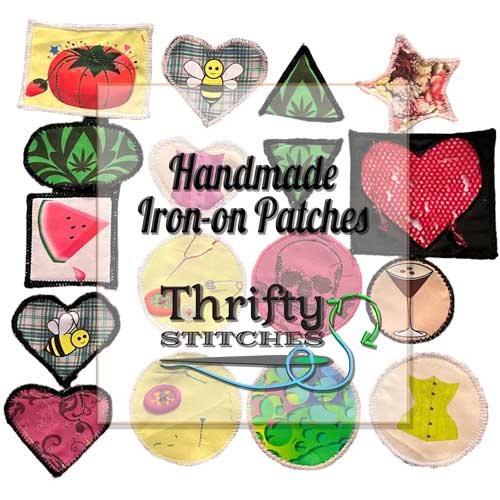
Handmade Iron-on patches came to mind when trying to think of some creative ideas for using up my Spoonflower swatches.
– For those who aren’t familiar, Spoonflower.com is a print-on-demand marketplace where you can buy and sell designs on fabric, wallpaper and homewares. Spoonflower print the designs and post to you or your customer.
Before a seller can make their design available for purchase, they need to purchase a sample of the design themselves. The 2 most economical ways to do this are:
- Put 42 designs on a 1 yard “cheater quilt” (6 inch square per design). This option can be found under the “Fill-a-Yard” section on the fabric menu.
- Or create a collection of 30 of your own designs and click “Get a sampler” (8 inch square per design).
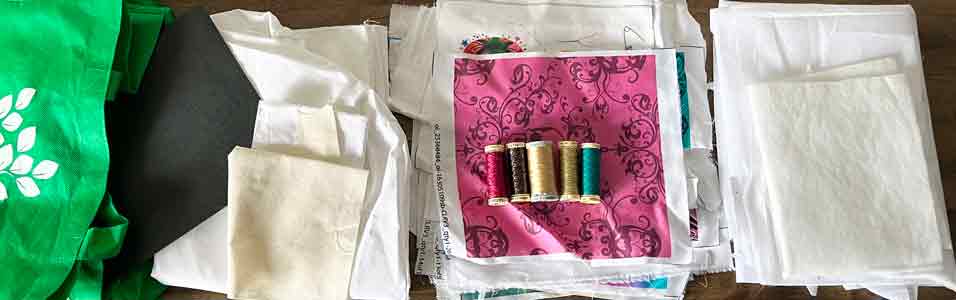
Needless to say, a busy designer can end up with a hoard of these swatches. So, this is a great quick little project for using up those spoonflower samples. Of course, these swatches are not essential – Scraps of quilting cotton are also a great option and often have themes, patterns and small motifs making them perfect for patches.
Here is what I used:
- Rigid plastic (optional) to make a stencil. I used the plastic base out of a reusable green grocery bag.
- Cricut Maker (optional). If you don’t have a Cricut machine you could trace around cookie cutters or make some shapes from card. Or just trace around the first shape you cut out.
- Iron-on (fusible) Interfacing. This is what will make your iron-on patch able to iron-on to other garments.
- Spoonflower samples or scrap fabrics of choice.
- Plain coloured scraps (optional). I used calico and layers of white woven cotton to make some patches thicker/sturdier, and to cover embroidery thread on the back.
- Embellishments (optional). I used embroidery thread, buttons and beads. You could try lace, paint, … anything that won’t be impossible to iron over when applying the final product.
- Sewing machine. For binding all the edges. Not really optional unless you have an awful lot of time on your hands. An overlocker can be handy for some of the shapes, but we’ll talk about that below….
How to make them:
(Inclusive of tips on how NOT to make them based on my fails)
Making the handmade iron-on patches is a quite simple process of cutting, layering, embellishing, and binding the shapes. I have used a Cricut Maker 3 in the first 2 steps.
The additional Cricut steps are definitely a time saver if making more than a handful of patches, but the project can absolutely be done by hand too!
If you aren’t using a Cricut just jump in at step 3.
1. Making a stencil with Cricut machine.
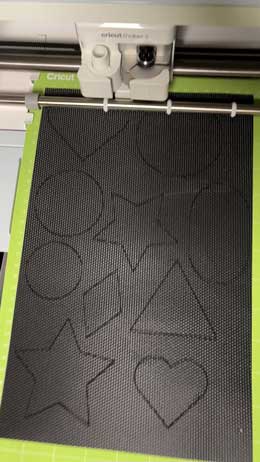
I won’t supply you with an SVG file for this because it is so easy to just choose the shapes available in Cricut Design Space, and size them as desired. I made my shapes between 2 and 4 inches wide/high. When doing this project again, I would probably exclude the smaller shapes and stick to simple shapes like squares and circles. The stars were a little trickier to work with, but not impossible.
Open your Design Space canvas, place your shapes as desired to fit within the measurements of your plastic or chosen stencil material.
Now you will need to select all of your shapes and use the “attach” function to lock them in place. This will prevent Cricut from moving your shapes to different positions upon cutting.
To upcycle the green bag plastic insert I used a deep point blade, on default pressure and did 9 passes (3 passes at a time until I could pop the shapes out).
2. Cut Interfacing and layers on Cricut.
You can now use your Design Space layout to cut your plain scrap layers and interfacing. Change the material to Calico or similar and the Cricut will require you to use the rotary blade to cut these fabrics.
For smaller sized off-cuts I just manual stopped the Cricut machine when I’d fit as many shapes as possible.
For larger pieces I duplicated some of the shapes and added to the canvas. To do this you will need to select the shape area and click attach/detach again. With all the shapes detached from each other duplicate the chosen shapes. Again, select each shape and hit “attach” to lock them in place for cutting.
3. Cut fabric designs.
Place your stencil, cookie cutter or pattern piece around sections of your Spoonflower swatches or quilting scraps and trace around and cut out. (It really doesn’t matter what type of pen/pencil, you won’t see any on the final product.) If not using a Cricut machine for step 2 then also trace out and cut your interfacing and any extra layers this way.
Some of my swatches were Spoonflower Petal Signature Cotton and some were their Organic Cotton Sateen. I love Spoonflower’s Sateen, so I often buy this with the intention of making small fabric purses/pouches from swatches.
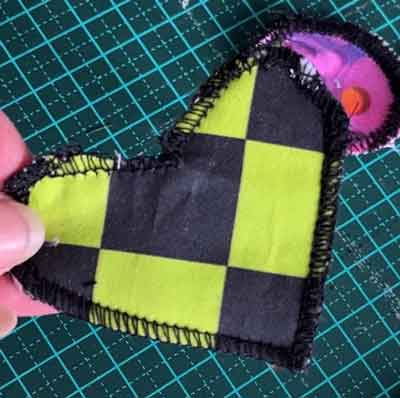
However, I can confirm for this project the Petal Signature Cotton wins. The sateen looks great in a couple of cases and quite wonky in others (see photo below). Both had the same layers, I straight stitched around before I started binding but must have warped the sateen which has a slight stretch. Overall, a simple woven cotton will yield more consistent results.

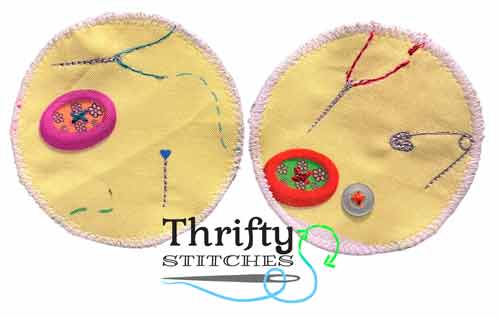
4. Add Embellishments.
With all your pieces cut it gets easy, almost addictive! as you quickly see the final product come to life. I couldn’t help but make “just one more”, and yet another, when it was well and truly past bedtime!
I layered the outer fabric with one piece of calico cotton to stabilise it before embellishing.
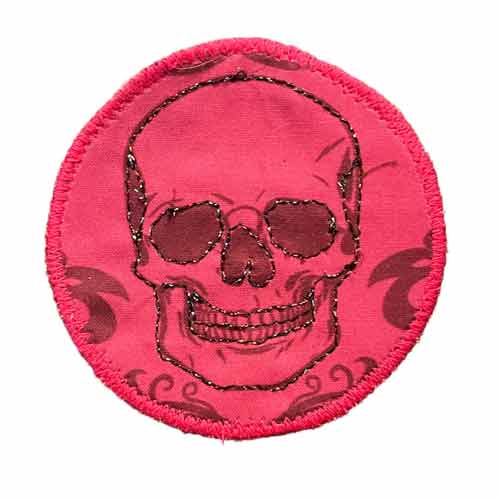
In one case I sewed a little button on, and on others I used top stitching, including metallic embroidery thread.
I’ve never managed to find a thread better than the Gutermann brand. However, it is often on the pricier side, and retail stores, even Australia’s largest chain stores, don’t seem to have a full range. Good quality thread is really essential to any sewing project, and a material that can rarely be salvaged, upcycled or thrifted in good condition. So therefore, I think it’s worth investing in a range that will save you time and money in the long run. Here is my affiliate link to the best value sets I have been able to find: Gutermann rayon thread.
5. Layer Interfacing and machine bind the edges.
In some cases, I added another layer of cotton behind the embellished layers (given the interfacing is semi-transparent, it looked much neater).
Then add the interfacing to the back. Make double sure the fusible adhesive side is facing outward! (Yeah, I made that mistake… Twice!). You might need to hold it under a light or look carefully to see the shiny little dots of heat-activated adhesive on one side.
On some I used a fusible wadding in place of the interfacing, giving the finished handmade iron-on patch a puffy, 3-dimensional look.
Straight stitch around the edge of the shape, about 1-2mm from the edge, to hold the layers in place.
I found the overlocker was only good for the edges of squares and triangles. I really struggled to not make a mess of any other shape, and so turned to my regular machine.
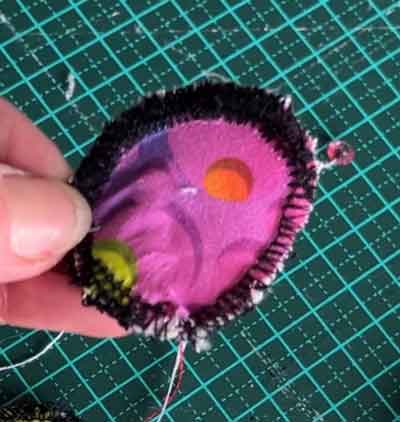
The basic zigzag stitch at a short length turned out to be my best option over any of the stretch stitches. Simply zig zag over the edge without piercing the edge of the fabric on the outer stitch. When the needle pierces very close to the edge it just causes some fraying, which then creates more work to bind it.
And by this point you will be proudly gazing up on an array of your very own custom handmade iron-on patches ready for use!


Tips for applying handmade iron-on patches:
Use the cotton setting on your iron. Or the hottest setting possible for your chosen fabric.
Iron the patch for a few seconds with a shot of steam.
Allow the adhesive a moment to reset, then gently try to lift a corner of the patch to ensure it has stuck securely.
Repeat the process if needed, until well adhered.